How to Prevent Leaks with Regular Bathroom Plumbing Maintenance
Key takeaways
- Small bathroom leaks can waste thousands of gallons a year and cause hidden rot and mold that insurance may not cover.
- Watch for stains, soft floors, and musty smells, and use the two-hour water meter test to find hidden leaks.
- Test toilets with food coloring to catch a leaking flapper, and replace a wobbly toilet’s wax ring quickly.
- Check under sinks monthly, fix dripping faucets, and replace supply lines with braided steel lines every five to eight years.
- Recaulk tubs and showers when caulk cracks or molds, and seal grout once a year.
- Keep drains clear with hair catchers and gentle cleaners, and keep water pressure between 40 and 60 psi.
- Exercise shutoff valves twice a year, follow a monthly-to-yearly routine, and call a licensed plumber for leaks you can’t trace.
The bathroom has more plumbing packed into a small space than almost any other room in your home. There’s a toilet, a sink, a shower or tub, and a network of pipes and seals hidden behind walls and under floors. With water flowing through these fixtures many times a day, it’s no surprise that bathrooms are one of the most common places for leaks to start.
A small drip or a slowly failing seal might not seem like a big deal at first. But over time, hidden leaks can rot subfloors, stain ceilings below, grow mold, and drive up your water bill. Many of these problems are quiet until the damage is already done, and repairs can cost hundreds or even thousands of dollars.
The good news is that most bathroom leaks can be prevented with simple, regular maintenance. In this guide, you’ll learn the warning signs to watch for, easy checks you can do yourself, and how to know when it’s time to call a plumber.
1. Why Bathroom Leaks Cost More Than You Think
Water damage is one of the most common and expensive problems homeowners face. A leak doesn’t have to be dramatic to cause trouble. A faucet that drips once per second can waste thousands of gallons of water a year. A toilet with a worn flapper can waste even more, sometimes hundreds of gallons a day, without making much noise.
The bigger cost is often the damage you can’t see. Water that seeps under a toilet or behind shower tile can soak into wood subfloors and wall framing. Over time, this can lead to soft floors, loose tiles, peeling paint, and mold growth. Mold can start growing on damp surfaces within 24 to 48 hours, and it can affect your family’s health. Many homeowners insurance policies also won’t cover damage from slow, long-term leaks that could have been prevented.
Learning how to prevent plumbing problems doesn’t require special skills. A few minutes of checks each month and a short list of seasonal tasks can catch small issues early, when they’re cheap and easy to fix.
- Small drips and running toilets can waste thousands of gallons a year.
- Hidden leaks can cause rot, mold, and costly repairs.
- Insurance often won’t cover damage from slow, preventable leaks.
2. Know the Warning Signs of a Hidden Leak
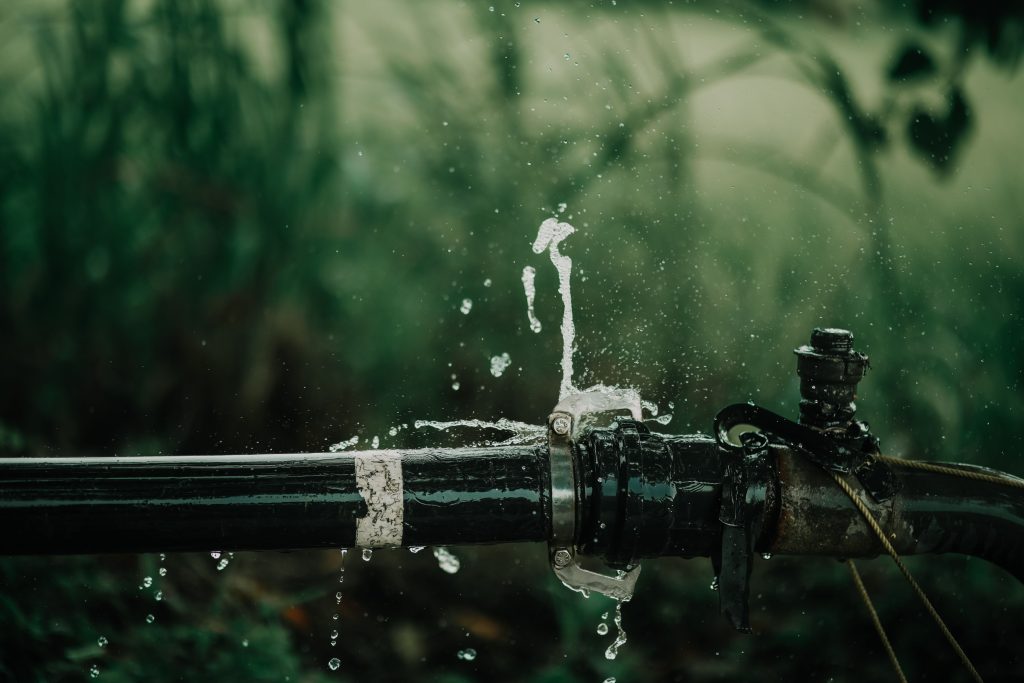
Many bathroom leaks hide behind walls, under floors, or inside cabinets. Knowing the warning signs helps you catch them before they cause serious damage. Look for water stains or bubbling paint on walls and ceilings, especially on the floor below a bathroom. Soft or spongy spots in the floor near the toilet or tub are another red flag.
Use your nose, too. A musty smell that doesn’t go away after cleaning often means moisture is trapped somewhere. Check under the sink for warped cabinet floors, water rings, or dampness. Loose or cracked tiles and grout that keeps crumbling can also point to water getting underneath.
Your water bill and meter can give you clues as well. If your bill jumps without a clear reason, you may have a leak. To check, turn off every faucet and water-using appliance, then read your water meter. Wait two hours without using any water and read it again. If the numbers have changed, water is leaking somewhere in your home.
- Watch for stains, bubbling paint, and soft spots in floors.
- A lasting musty smell can signal trapped moisture.
- Use the two-hour water meter test to find hidden leaks.
3. Keep Your Toilet in Top Shape
Toilets are one of the biggest sources of bathroom leaks. Inside the tank, a rubber flapper seals the opening to the bowl. Over time, it can warp or crack and let water slowly trickle through. To test it, add a few drops of food coloring to the tank and wait 15 minutes without flushing. If color appears in the bowl, replace the flapper. It costs about $5 to $15 and takes just a few minutes.
Also listen for a toilet that runs or refills on its own. This often points to a worn fill valve or a float set too high, which lets water spill into the overflow tube. Adjusting the float or replacing the fill valve is a simple DIY fix for most people.
Outside the tank, check the supply line that connects the toilet to the wall. Look for bulges, rust, or drips at the connections. Then check the base. A toilet that rocks or has water pooling around it may have a failing wax ring, the seal between the toilet and the drain pipe. Tightening the floor bolts can help a little, but a leaking wax ring should be replaced quickly to protect your subfloor.
- Do a food coloring test to check for a leaking flapper.
- Fix running toilets by adjusting the float or replacing the fill valve.
- Replace the wax ring if the toilet rocks or leaks at the base.
4. Care for Sinks, Faucets, and Supply Lines
Once a month, open the cabinet under your bathroom sink with a flashlight. Run the water for a minute, then feel the pipes, the curved P-trap, and the supply line connections for any dampness. A paper towel wrapped around each joint can help you spot even tiny drips. Tighten loose slip nuts on the drain by hand or with gentle pressure from pliers.
A dripping faucet usually means a worn washer, O-ring, or cartridge inside the handle. These parts are inexpensive and available at hardware stores. Turn off the water at the shutoff valves under the sink before taking the faucet apart. Bring the old part with you to the store to make sure you buy the right match.
Pay close attention to the flexible supply lines that carry water to the faucet and toilet. Old plastic or rubber lines can crack or burst without warning. Replace them with braided stainless steel lines, which cost about $8 to $15 each. Many plumbers suggest replacing supply lines every five to eight years, even if they look fine. While you’re at it, unscrew and clean faucet aerators every few months to remove mineral buildup.
- Check under the sink monthly for drips and dampness.
- Replace worn washers or cartridges to stop faucet drips.
- Upgrade to braided steel supply lines and replace them every five to eight years.
5. Maintain Shower and Tub Seals
Showers and tubs are protected by caulk and grout, which keep water from seeping into the walls and floor. Over time, caulk shrinks, cracks, and peels away, especially where the tub meets the wall. Inspect these areas every few months. If you can push a fingernail into a gap or see dark mold spots that won’t wash off, it’s time to recaulk.
To recaulk, cut out the old caulk with a utility knife or caulk removal tool. Clean the area with rubbing alcohol and let it dry completely. Then apply a smooth bead of 100 percent silicone caulk made for kitchens and baths, and let it cure for at least 24 hours before using the shower. Most bathrooms need fresh caulk every one to five years.
Grout needs care too. Seal cement grout once a year with a penetrating grout sealer to help it resist water and stains. Fix cracked or missing grout quickly. Also check the escutcheon plates, the round covers behind the faucet handle and showerhead, and seal around them so water can’t run into the wall.
- Inspect caulk every few months and replace it when cracked or moldy.
- Use 100 percent silicone caulk and let it cure for 24 hours.
- Seal grout yearly and check around faucet trim plates.
6. Keep Drains Clear the Safe Way
Clogged drains might not seem like a leak problem, but they can lead to one. When water backs up, it puts extra pressure on pipe joints and seals, and standing water can overflow onto floors. The most common culprits in bathrooms are hair, soap scum, toothpaste, and small objects that fall down the drain.
Prevention is easy. Place a hair catcher over shower and tub drains and empty it often. Never flush wipes, even ones labeled “flushable,” along with cotton swabs, dental floss, or paper towels. Only toilet paper and human waste should go down the toilet. Once a month, pour a kettle of hot water down sink and shower drains to help clear soap buildup. You can follow it with a half cup of baking soda and a cup of vinegar, wait 15 minutes, then flush with more hot water.
Avoid harsh chemical drain cleaners as much as possible. They can damage older pipes, harm septic systems, and are dangerous if they splash. For a slow drain, try a plunger or an inexpensive plastic drain snake first. Enzyme-based cleaners are a gentler option for regular upkeep.
- Use hair catchers and empty them often.
- Never flush wipes, floss, or cotton swabs.
- Choose plungers, drain snakes, or enzyme cleaners over harsh chemicals.
7. Check Your Water Pressure
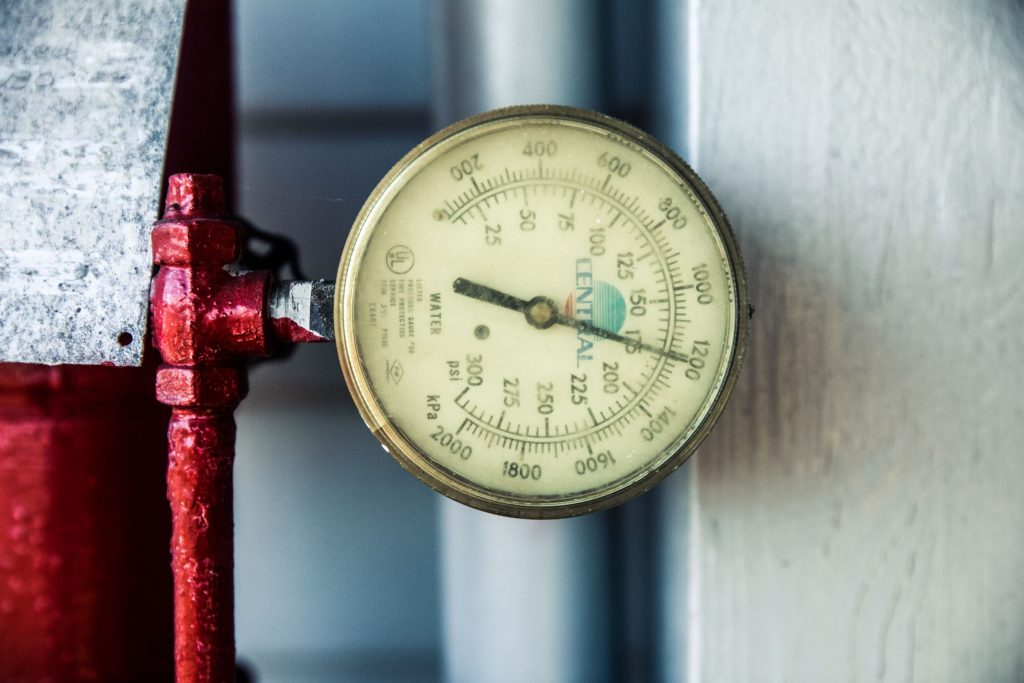
Strong water pressure feels great in the shower, but pressure that’s too high puts constant stress on pipes, valves, supply lines, and fixtures. Over time, this can wear out seals faster and cause leaks or even burst lines. Signs of high pressure include banging pipes, faucets that drip often, and toilets that run randomly.
You can check your pressure with a simple gauge that screws onto an outdoor hose spigot or a laundry faucet. They cost about $10 to $20 at hardware stores. Most homes do best with water pressure between about 40 and 60 psi. Many plumbing codes set 80 psi as the upper limit for homes.
If your reading is above 80 psi, a plumber can install or adjust a pressure-reducing valve, sometimes called a PRV, where the water line enters your home. Many homes already have one, but they can wear out after 10 to 15 years. Fixing high pressure protects every fixture in your house, not just the bathroom.
- High water pressure stresses pipes and seals and causes leaks.
- Test pressure with an inexpensive gauge and aim for 40 to 60 psi.
- Have a plumber install or replace a pressure-reducing valve if it’s over 80 psi.
8. Test Shutoff Valves and Follow a Seasonal Routine
When a leak happens, every second counts. Make sure everyone in your home knows where the shutoff valves are. Each toilet and sink should have its own small valve, and your home has a main shutoff where the water line enters, often in a basement, crawl space, garage, or near the water heater.
Shutoff valves that sit unused for years can get stuck or start leaking when you finally need them. Twice a year, gently turn each bathroom valve off and back on to keep it working. If a valve won’t turn, drips when you move it, or doesn’t fully stop the water, plan to have it replaced. Quarter-turn ball valves are easier and more reliable than older multi-turn styles.
A simple routine keeps everything on track. Each month, check under sinks and around toilets. Every three months, clean aerators and inspect caulk. Twice a year, test shutoff valves and do a food coloring test on each toilet. Once a year, check water pressure, seal grout, and consider a small water leak detector, which costs about $15 to $30 and alarms when it senses water on the floor.
- Know where every shutoff valve is, including the main.
- Turn bathroom valves off and on twice a year to keep them working.
- Follow a monthly, quarterly, and yearly maintenance schedule.
9. Know When to Call a Plumber
Many bathroom maintenance tasks are easy DIY jobs, but some problems need a licensed plumber. Call a pro if you find water stains on a ceiling below a bathroom, soft or sagging floors, or a leak you can’t trace to a visible source. These often mean water is escaping from pipes inside walls or under the floor.
You should also call for help if multiple drains clog or gurgle at the same time, which can point to a blockage in the main sewer line. Other signs include rusty or discolored water, very low water pressure throughout the house, or a shutoff valve that won’t close. Any job that involves cutting into walls, soldering pipes, or replacing a shower valve is best left to a professional.
When choosing a plumber, check that they’re licensed and insured in your state, read recent reviews, and ask for a written estimate. Some plumbers offer yearly inspection plans, which can be a good value if your home is older. Catching a problem early almost always costs less than repairing water damage later.
- Call a plumber for ceiling stains, soft floors, or untraceable leaks.
- Multiple clogged drains may mean a main sewer line problem.
- Hire licensed, insured plumbers and get written estimates.
Conclusion
Bathroom leaks rarely start as emergencies. They begin as a worn flapper, a cracked bead of caulk, a loose drain nut, or an aging supply line. Left alone, these small issues can turn into rotted floors, moldy walls, and costly repairs. Caught early, most of them can be fixed in minutes for just a few dollars.
A little routine care goes a long way. Check under sinks and around toilets each month, keep caulk and grout in good shape, protect your drains, and make sure your water pressure and shutoff valves are working as they should. These habits protect your home, lower your water bill, and give you peace of mind.
Start with a quick walk-through of your bathroom this weekend. Test your toilets, look under the sink, and find your main shutoff valve. With a simple plan and a few tools, you can stay ahead of leaks and keep your bathroom dry and problem-free for years to come.
